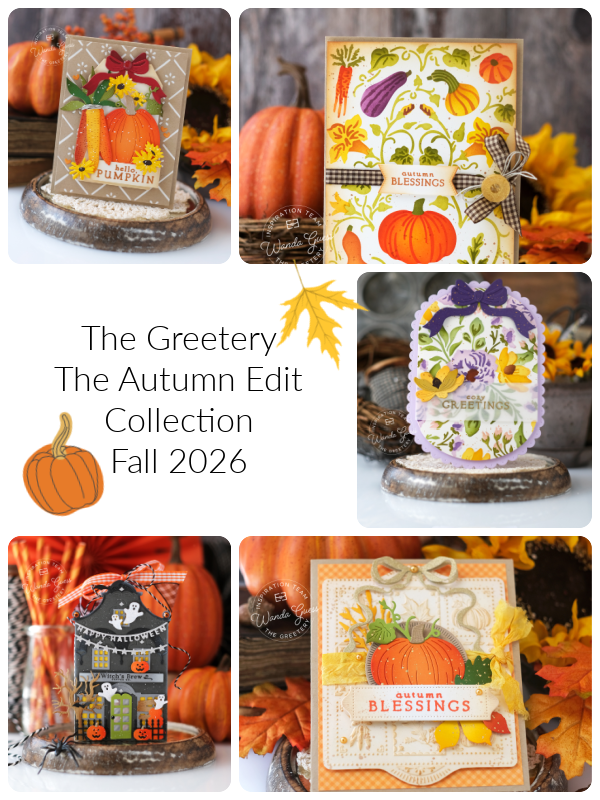
It was my pleasure to introduce the brand new and FUN Hey Honeycomb Summer Collection to you this week! And, I hope you love it as much as I do!! Why am I suddenly humming the songs from Little Mermaid? LOL. Happy Crafting!! If you scroll back to my last blog post, you can see all my projects from the new release! If you have any questions – reach out!! Thanks for all the love and kind comments! Happy Creating! Can’t wait to see what YOU make!
If you would like to subscribe to my blog – and never miss a post – please sign up by clicking this link! I would love it! CLICK HERE TO SUBSCRIBE!
Hi friends! I’m back today with something super fun from The Greetery! A Summer Mini Collection! Sea creatures that work with the honeycombs! There is a crab, a fish and a seahorse! And a wonderful suite of stencils, dies, and an embossing folder (Making Waves Suite) that work together to create the perfect wave background. And also the Hey Honeycomb Summer sentiment set. If you love the ocean, you’re gonna love this collection! There are also new honeycombs – one set in crab colors and one set in ombre tropical colors. It’s just really cute and cheerful! I made a card to share with you and a little fish too! Let’s get started!
My finished card is an A7 size – 5″ x 7″! I needed more room for that big wave! I used lovely aquas and that bright pop of red – one of my favorite color combinations! I started this card by stenciling the waves in various shades using blending brushes. I splattered the wave panel with white paint splatter and added glitter glue to the tips of the waves….
I die cut out all the pieces of the crab using red cardstock. I used deep brick ink to ink the claws and legs to add a bit of dimension. I also added white gel pen accents, glitter glue, and red gems. He is FANCY! Lolz. I glued the pretty honeycomb to his belly.
For my sentiment, I die cut out the smallest A2 arch from vellum and stamped the sentiment using Stazon ink! I wanted the wave to show through the back of the sentiment so I used vellum.
Here is my little fishy fishy! I die cut him out of lime green cardstock and then used aqua cardstock for his fins and tail. I used one of the gorgeous ombre honeycombs for his tummy!
As always, Betsy has a super fabulous giveaway for today! Two product bundles containing all of the products in the new mini release!! Team blog comments will be included in the drawing! Comment deadline is Thursday, 5/28 at 11:59 pm EDT. Winners announced on The Greetery blog at 7 am EDT on Friday, 5/29. Good Luck Everyone!
Hi creative and crafty friends! It’s my turn today on The Greetery Blog. Hope you are having a great Spring and that everything is awesome in your craft room! As now it’s the end of May, and soon to be Summer, my mind turns to Summer occasions! Most of all, in the Summer, I love a patriotic theme. I love the 4th of July, picnics, fireworks, gingham….
And this year, 4th of July will be extra special as we celebrate America’s 250th birthday! I was in Junior High School when it was the Bicentennial and it was so fun to celebrate! The Greetery has THE BEST Americana supplies and I wanted to create a pretty and patriotic card to share with you today. I used cream, deep red, and navy blue with pops of gold for my color palette…
If you would like to subscribe to my blog – and never miss a post – please sign up by clicking this link! I would love it! CLICK HERE TO SUBSCRIBE!
My finished card is an A2 Kraft card base, layered with navy and then a cream panel. My card features LOTS of Americana supplies: the Stars and Stripes Bow, the Wave the Flag Dies, and the gorgeous Land of Liberty Stamp Set. I started by die cutting out all my pieces – the flag, the bow, the stars and the crest. I assembled the flag and the bow and gently inked the edges with Antique Linen Distress Ink.
I inked around the edges of the cream panel to make it look a bit vintage/aged. I put the flag die cut onto the card first, starting at the bottom left corner. I stamped and heat embossed the sentiment and attached it to the crest. I attached the crest over the flag portion using foam adhesive. Then I glued the bow at the top of the crest. (More is MORE!) I added the Star Struck die to the card and then sprinkled the extra stars around the card. I finished up with gold paint splatters and a few red gems!
That’s it for my project for today! I hope you have an awesome and creative day! Wishing you all the best as we get ready for Summer creating! Happy Birthday America! Blessings to you and your families. I will see you soon… In the meantime, happy crafting! God Bless America! XO
Hellllloooooooo! How is your week going? I hope you’re doing great and having a beautiful week my friends. I have something fun and joyful to share with you today. BUGS! Hee hee. Yes, bugs and bees can be absolutely adorable in my book! Pretty Pink Posh just launched their cute new May 2026 release. It’s really really fun and I had a big smile on my face making all these cards to share. I used TONS of color and ink blending and glitter, and all the good crafty things. I hope to make you smile too! This post has three cards and lots of photos!
If you would like to subscribe to my blog – and never miss a post – please sign up by clicking this link! I would love it! CLICK HERE TO SUBSCRIBE!
Everything is available now and my supplies are linked throughout my post. Let’s goooooo! Bzzz bzzzzzzz.
First up is this sweet beehive card! I think it’s my favorite one I made for the new release. So many bright and happy colors and the sweetest little bee! This card has TONS of new products on it! My finished card is an A2 card base, layered with honey yellow gingham and then an ink blended panel. This card features the new Stitched Bugs, Beehive Shaker, Everyday Branches, and Rounded Rectangles… It’s all good!
I started by ink blending my background panel and setting it aside to dry. Then I die cut all the pieces of my hive, the branch, leaves, flowers and bee…. I ink blended the hive using lots of distress inks (colors are linked in the supplies) and also Copics. I used a white gel pen to accent the pieces. The sentiment is from a new banner set!
I used glitter for his wittle wings! And I added a hot pink heart to him… Isn’t this the cutest thing ever??
This card was made with a lot of love! Here’s a close up of the branch, leaves and flowers…
Next up — more bees! (I actually really love bees!) This card features the brand new Bee Additions stamp set and matching dies. It also features the brand new Eyelet Hexagon dies and the new Hexagon Stencil! My finished card is a white A2 card base layered with black gingham, yellow and white…
I used Copic Markers to color in the beehive, the bees and the flowers… I added bits of glitter to their wings and to the beehive. It’s so pretty in person! I ink blended the top of the hexagon shape for a bit of depth to the card. I haven’t used my Copics in a while and it was super fun to sit and color! Yay! For the side panel, I used several colors of distress inks and the new stencil to make a large panel. Then I just trimmed it to fit the side of the card. I tried using the whole panel, but I thought it was too busy. This panel was just enough!
My final card for today features a big giant snail! Yes, a cute snail! Ha! This card features the brand new Snail Shaker dies! My finished card is an A2 card base, layered with gingham and then a white panel made with the Pinking Rectangles. I chose an all blue, green and teal color palette for this one to mimic a garden! To ground all that color I chose to use accents of kraft. I die cut out all my pieces and splattered some of them. I did not do any ink shading on this card… I used the mushrooms from previous die sets and they go perfectly! (also linked in my supplies list)
Well that was fun! Thank you for stopping by to see all the new goodies and share the joy of crafting and cardmaking with me! I hope you found something to inspire you to create! Have a blessed and wonderful day! I’ll be back in a couple of days with more fun things! XOXO
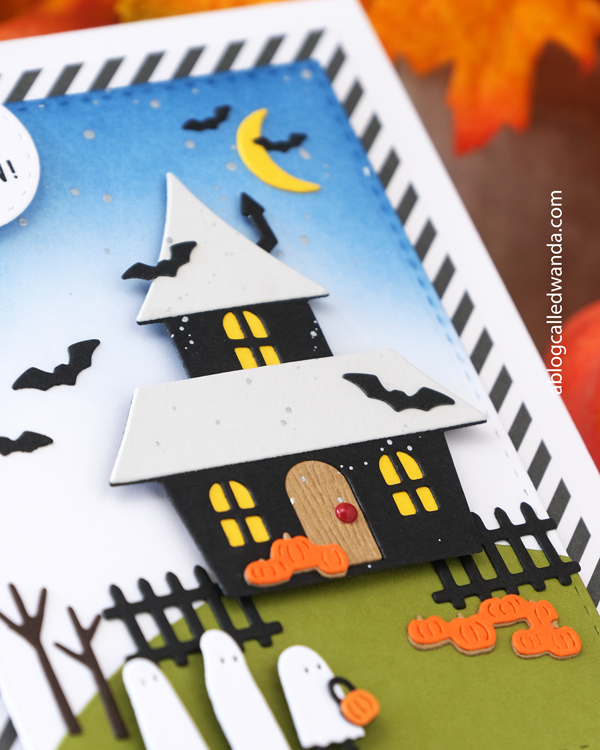
Happy Anniversary Greetery! It was my pleasure to introduce the brand new and gorgeous Fete & Fiesta Collection to you this week! And, I hope you love it as much as I do!! It feels like a party to me! YEAH! Happy Crafting!! If you scroll back to my last two blog posts, you can see all my projects from the new release! If you have any questions – reach out!! Thanks for all the love and kind comments! Happy Creating! Can’t wait to see what YOU make!
If you would like to subscribe to my blog – and never miss a post – please sign up by clicking this link! I would love it! CLICK HERE TO SUBSCRIBE!
Hi friends! Welcome back to Day Two of our showcase days for the Fete & Fiesta Collection from The Greetery! Did yesterday make you in the mood for a party!? If it didn’t, today will! I have three more projects today for you! Can’t wait to show you. Remember that release day is tomorrow, 5/14 at 10am EST. This is such an happy release – for The Greetery’s seven year birthday! Congratulations to Betsy, and thank you for creating all these fun things for us to play with! Let’s get started today… Thanks for joining me!
If you would like to subscribe to my blog – and never miss a post – please sign up by clicking this link! I would love it! CLICK HERE TO SUBSCRIBE!
First up today is a birthday card featuring the brand new Celebration Borders, Party Scene Dies, and Party Scene Stencils! I used my favorite birthday color palette and put in pops of gold shimmer… So, funny story, sometimes being the first ones to make something with new products is a bit hard! I’m pretty sure I didn’t use these amazing layering dies exactly correctly! Ha. So I am anxiously awaiting a look at Betsy’s projects to see how she did it! The new dies fit into the capsule collection shapes and layer – balloons, banners, etc. The stencils perfectly match the shapes which makes it easy to color!! This finished card is an A2 card base so you can see how large the dies are…
I heat embossed the new sentiment in gold onto vellum and tucked it in there too. Lots going on…. But I love the feeling of it. I also think this could be a great Happy New Year card! (I hope I remember that idea!)
I splattered on some gold paint to the elements and ink blended a nice background layer. A few gems too… The Celebrate banner is another element from the Marketplace Celebration dies! It fits perfectly!
My next card is a special one, because I used new elements to make a birthday card for one of my friends! Her birthday is next week and I hope she doesn’t see this post! This card features the brand new For The Ages awesome number dies, the new Laid Back Basics stamps and dies (the celebrate word) and the brand new Pretty Picado Flowers dies. LOTS of things on this card! I used another one of my favorite color palette – ocean colors of green, teal and aqua… My finished card is an A2 size. I die cut the numbers from teal with a silver outline. I die cut lots of those beautiful flowers and leaves and put them around an oval shape…. Pearls and silver paint splatters finish off the look! I hope she likes it!
And last, but not least, my final card for release week! (there’s those pretty flowers again!)… This card features the Capsule Collection and the SO SO SO beautiful new Pretty Picado Cutaway Dies! Yowza – this is stunning in person – those intricate and perfect die cuts! I used a fresh lemon and lime color palette perfect for Summer time. The sentiment is from the new Laid Back Basics stamp set (a must have)! Lots of layers here but it all works. The Pretty Picado stamps/dies/stencils suite is really cool – so many ways to use everything! Oh and I threw a little bow on there for good measure too!
That’s it for today – and day two of our showcase of projects for the Fete & Fiesta Collection! Thanks for stopping by to share with me yesterday and today! It’s my pleasure to introduce the new release. TOMORROW is release day! YEAH!! Get your shopping list ready! Enjoy this new release and happy crafting! XOXO
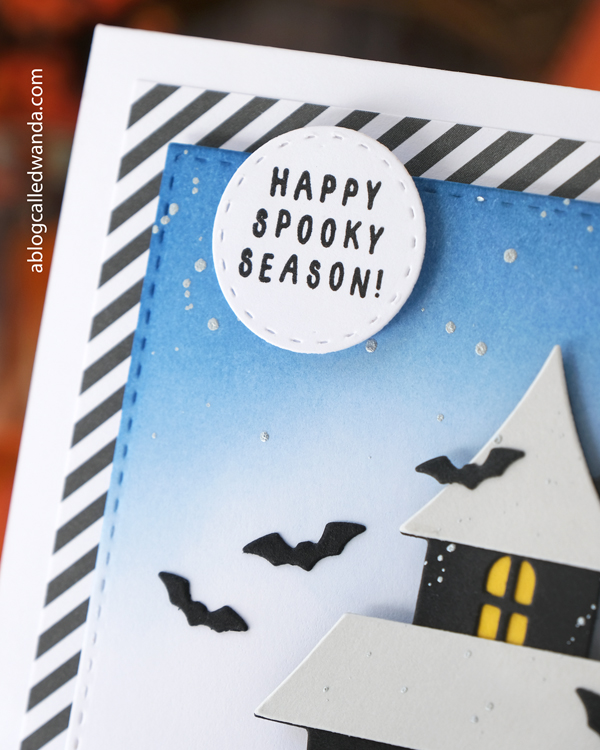
Giveaway Information: The Greetery is giving away SEVEN $100 gift certificates! The comment deadline is 5/13 at 11:59Pm EST (comments from team blogs entered into giveaway). Winners announced on The Greetery blog on 5/14 at 7AM EST (right before the new products go live) GOOD LUCK!!
COMMENTING NOTE: On my new blog – to leave a comment, you must open the post first. Then the comment box will appear at the bottom. You can click here to make it easy!
Hello hello hello my sweet, crafty friends! Something fabulous starts today! The Greetery is celebrating SEVEN years of creative fun! Can you believe how fast seven years went by? I am so completely happy for Betsy and her success, and so very honored to have been part of her crew from the very beginning. Crafting for and with Betsy is a dream! With that, I will announce that The Greetery has a brand new release this week! It’s called Fete & Fiesta, and it’s a party! Everything is fun and cheerful and celebratory and so so creative. The design team will be showcasing our projects today and tomorrow and then release day will be Thursday, May 14th at 10am EST. I have been waiting, not so patiently, to share everything with you! Three projects today, and three more tomorrow! WOOT! I’m hoping to inspire you and make you smile! Let’s go!
If you would like to subscribe to my blog – and never miss a post – please sign up by clicking this link! I would love it! CLICK HERE TO SUBSCRIBE!
First up today is a card featuring the brand new Marketplace Celebration Dies and Stamps! The newest addition to the Marketplace suite of products…LOVE. The new dies feature window boxes and flowers, and banners, and a BIKE! EEP it’s so cute! I immediately wanted to create a Cape Cod Bookstore with blue hydrangeas and a red bicycle, and a banner for the 4th of July! I used the Marketplace #2 building to create my shoppe. I used woodgrain cardstock to mimic Cape Cod shingles, and black shutters…and blue flowers (hydrangeas) everywhere! My husband and I were married on Cape Cod and left my heart there for sure! My finished card is an A2 white card base. I used the A2 Arches dies to make a soft background of blue gingham…… Putting this all together was so fun! That bike?? Are you kidding me??!
This release contains a fun new treat/trinket box die set! It’s called the Arch Box Mini! Like the previously released Arch Box, only smaller! It’s so cute!! I used the new box to create some fun birthday party favors. They were so easy to put together! Two pieces die cut and then attached together. (Easy!) And then the top has a hole to put ribbon/twine through to hold it together. Small candies or gifts would fit inside. My vote is candy! Ha. There are new word dies being released this week and the word dies (happy) fit exactly onto the panel of the box. I die cut out the words and then put vellum behind the words for a bit of elegance! I really like how this looks…. I added balloons dies – which are part of the above Marketplace Celebration Die set! Soft pastel colors and a bit of silver for the balloon strings. This is one of those things where the possibilities and colors and ideas are endless….
Here is one in my hand for size and scale. I think they would be so cute at a place setting with a name card for a little festive touch! And super cute wedding favors too!
For my third project today, you better put on your sunglasses! Because I used ALL the bright and pretty colors for this one! This card features new add ons to the Capsule Collection. This new collection is called Pretty Picado! I used the AMAZING stencils and so many colors to create this one! It’s hard to see in the photo, but the outer border is a black zig zag capsule, which is also new! The word stamp is new, with matching dies… The stamp set is called Pretty Picado also – a whole suite of things. I will be using some more of the Picado products tomorrow.
This card was kept simple to show off those stencils… I wrapped a vellum panel around the white layer and then some pretty ribbon and then the sentiment on top. I heat embossed the sentiment in gold on black paper. So dramatic!
That’s it for today – day one of the showcase of projects for the Fete & Fiesta Collection! Thanks for stopping by to share with me today! It’s my pleasure to introduce the new release. I will be back tomorrow with three more cards!! YEAH!! Don’t miss it!! Seriously. Don’t miss it! DO NOT MISS IT!
Giveaway Information: The Greetery is giving away SEVEN $100 gift certificates! The comment deadline is 5/13 at 11:59Pm EST (comments from team blogs entered into giveaway). Winners announced on The Greetery blog on 5/14 at 7AM EST (right before the new products go live) GOOD LUCK!!
COMMENTING NOTE: On my new blog – to leave a comment, you must open the specific post first. Then the comment box will appear at the bottom. You can click here to make it easy!
Hi everyone! It’s been a moment since I did a ‘just because’ post here on my blog! I have been so super duper busy lately with work and church and all the things! I have been going non stop actually and I’m tired! LoL. This past weekend was just what I needed – a weekend at home. Sleeping in, organizing, and crafting! I enjoyed a lovely couple of days in the craft room making things to share with you soon! New things are coming from Pretty Pink Posh and The Greetery to name a couple! Yay! I also got to play with some goodies from Concord and 9th! That’s what I’m sharing today! A cuuuuuuuute cherry card! Let’s start the week off right! I hope you are doing well and have a blessed and beautiful week ahead. XO
My finished card is a white A2 card base layered with hot pink and gingham and bright white. I am featuring lots of things from the Cherry Nice suite of products. Instead of using dark red, I chose a pretty fresh pink color and bright green! Perfect for this first week of May! Time for sunshine and Farmers Markets! (I love cherries!)
I started by die cutting out the cherries, stems and leaves and assembling those pieces together. Then I stamped the sentiment and die cut it out with the matching dies.
In this shot you can see the wonderful embossing folder with the tiny cherry clusters! I die cut the larger white layer and then trimmed the embossed part to fit inside the stitched line – I love this look! And see how the cherries have a layer to show a highlight? LOVE!
I always like a pretty font mix, and this one is absolutely sweet! Crisp black for the sentiment…and you can see all my layers in this shot too. My finishing touches are a few little hearts and some clear drop gems… A good clean and simple card – for a big smile!
Okay, my friends, that’s it for today! Take care, have fun, and keep on crafting! I will see you soon! XOXO
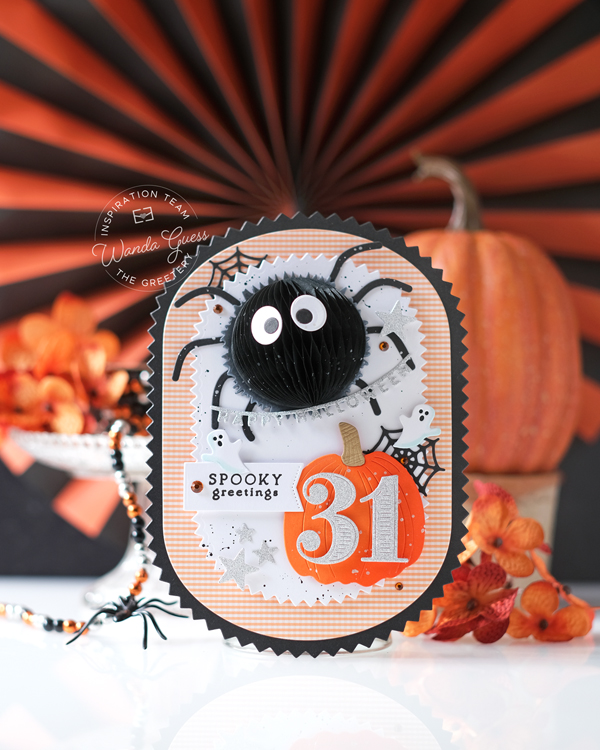
Hi everyone! Happy Friday! Woohooo! It was a super fun crafty week, don’t you think? Here comes the weekend, a gorgeous spring weekend, just in time! I have a fun card to share with you today! It’s my day up on The Greetery Blog so pop over there too if you would like! I hope you have some fun plans for the weekend. We have tons of yard work to do and some general relaxing too!
Hope you had a wonderful Easter and that everything is good in your crafty place! I am still loving a pretty Spring color palette and brighter, more cheery cards for the season. How amazing was last month’s new release? I loved it all! I knew I wanted to make some more Silly Goose cards, and I have one to share with you today. I made this one for a girlfriend who loves geese and I used a pretty color scheme grounded with cream and kraft… Let’s look!
My finished card is an A2 Cream card base. I used the A2 Stitched Scallops Dies in Kraft to make a pretty background. I layered on some gingham paper and then another cream panel. I die cut out all the pieces for my cute goose, her hat, and the balloons using the awesome Silly Goose Dies. (I am obsessed)… I put the goose together and added shading with Copic Markers.
I die cut two hats and hand cut out the stripes to make it a bit more festive! White gel pen accents on there too! For the balloon, I gently inked the tops of the balloons with matching Distress Inks. The balloon strings are gold cardstock.
I stamped and gold heat embossed the sentiments from the Silly Goose Sentiments stamp set and I used the matching die for the larger sentiment. I cut the smaller sentiment out with my paper trimmer. I layered all the pieces onto my card using foam squares for added dimension.
That’s it for my project for today! I hope you have a fantastic and creative day! Wishing you all the best. It’s my pleasure to share with you every month. Happy Spring! Honk Honk! Blessings to you and your families. I will see you soon… In the meantime, happy crafting! XO Wanda
Hi friends! WOOHOOOO! It’s time for a new product release from Concord and 9th! ANNNDDDD….new colors too! Yes, you heard that right, a new color drop just in time for Spring! Today is launch day, and everything is already available in the Concord and 9th storefront! So you can shop to your heart’s delight. The new colors are fresh and beautiful. The new colors are: Aster, Bluebell (my personal favorite), Surfside, Basil, Berry Kiss and Capri! My card for today features the new colors (most of them) along with the new stamps and dies. Let’s get to it!
FYI – all the new colors have cardstocks, ink pads, and enamel dots!
My finished card is an A2 white card base. I layered that delicious Bluebell color and then a Kraft Layer embossed and die cut into that pretty oval shape. The star of the show is the brand new Handpicked Dies! A huge gorgeous floral bouquet that makes me smile. I used all of the new colors except for Berry Kiss. I love that big flower in the center. Pow!
I started by die cutting out all the pieces of the floral grouping and then glueing them to the background die (so simple!). Then I splattered on some white ink. If you look closely, the die cut pieces have gentle ink blending using the matching ink pads. The sentiment is so sweet! I attached the floral portion to the card using foam dots. My finishing touch is some matching blue enamel dots. This card could be pretty in a million different color palettes!